Tutorial: Recycle a Uniform Into a Treasured Keepsake Purse
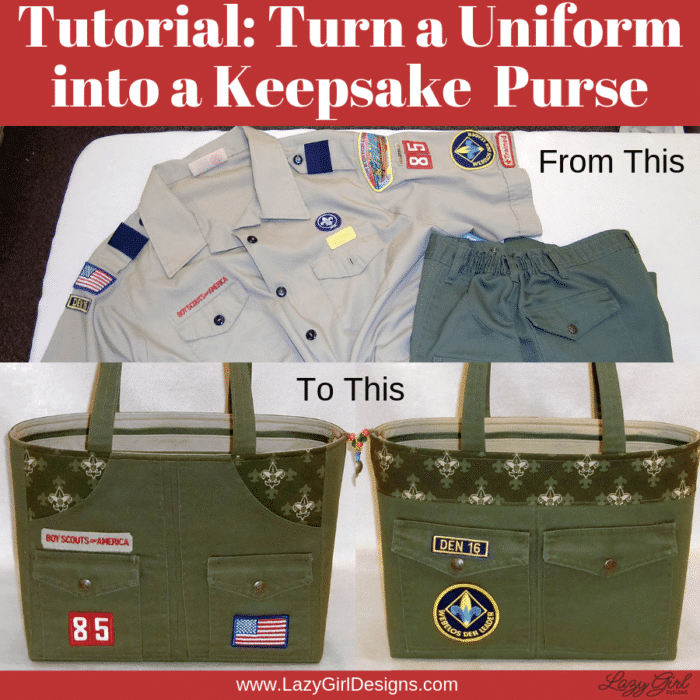
Lazies, Look at this fun and festive tote for my friend Kim in celebration of her youngest son becoming an Eagle Scout. See how to use a den mother’s uniform to craft this special keepsake bag.
I didn’t have a plan, but when I saw the fabulous pockets on those sturdy uniform pants, so I had a solid starting point. Imagine the possibilities in recycling one of your sentimental articles of clothing into a treasured keepsake like this purse.
Start With a Uniform or Favorite Piece of Clothing
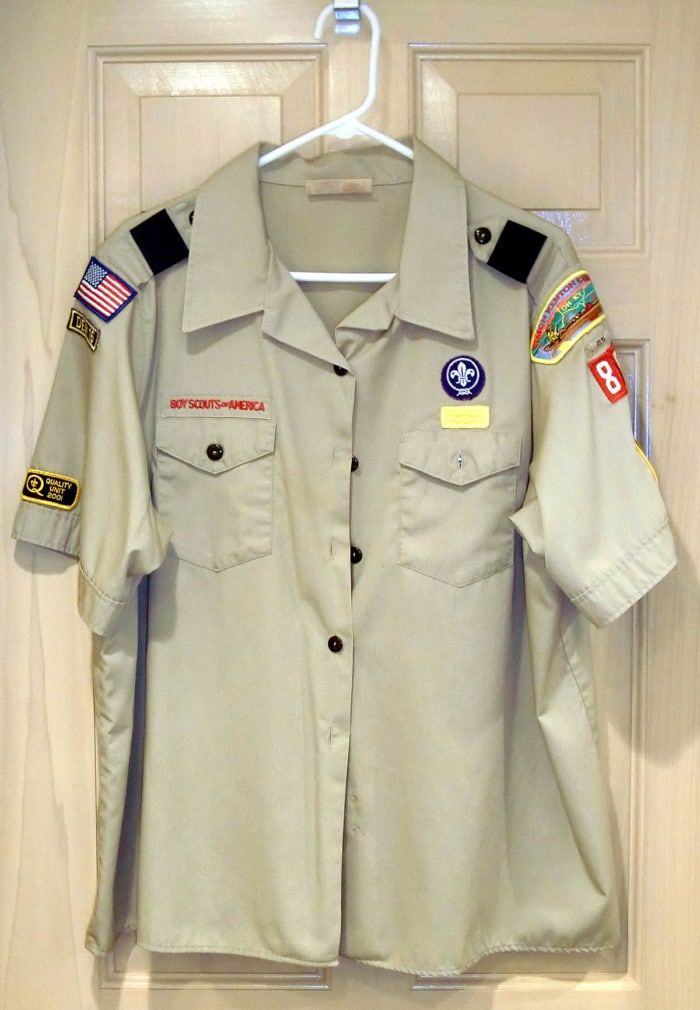
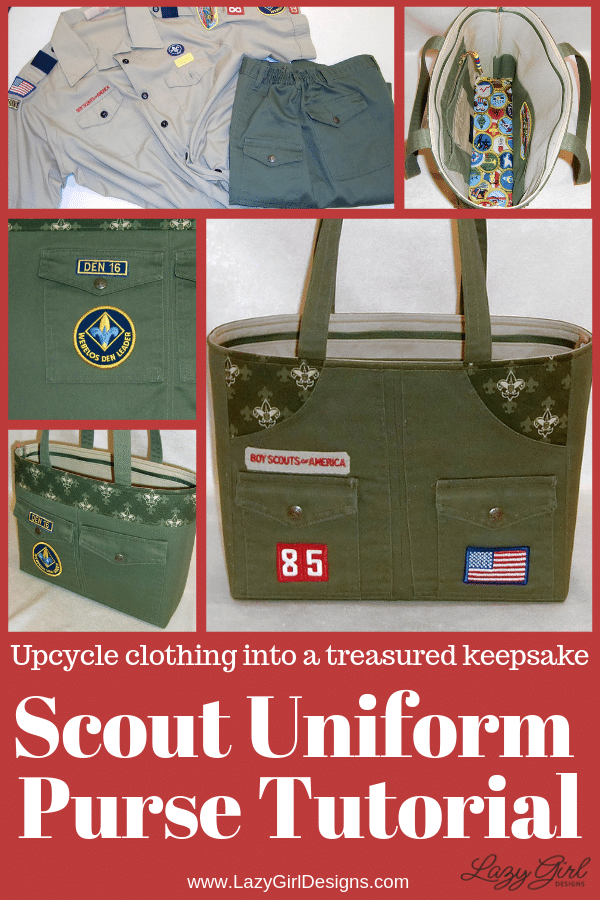
Here’s what I started with: Kim’s den mother uniform. This top is full of fun sewn details like the pockets, as well as badges that I can use for embellishments.
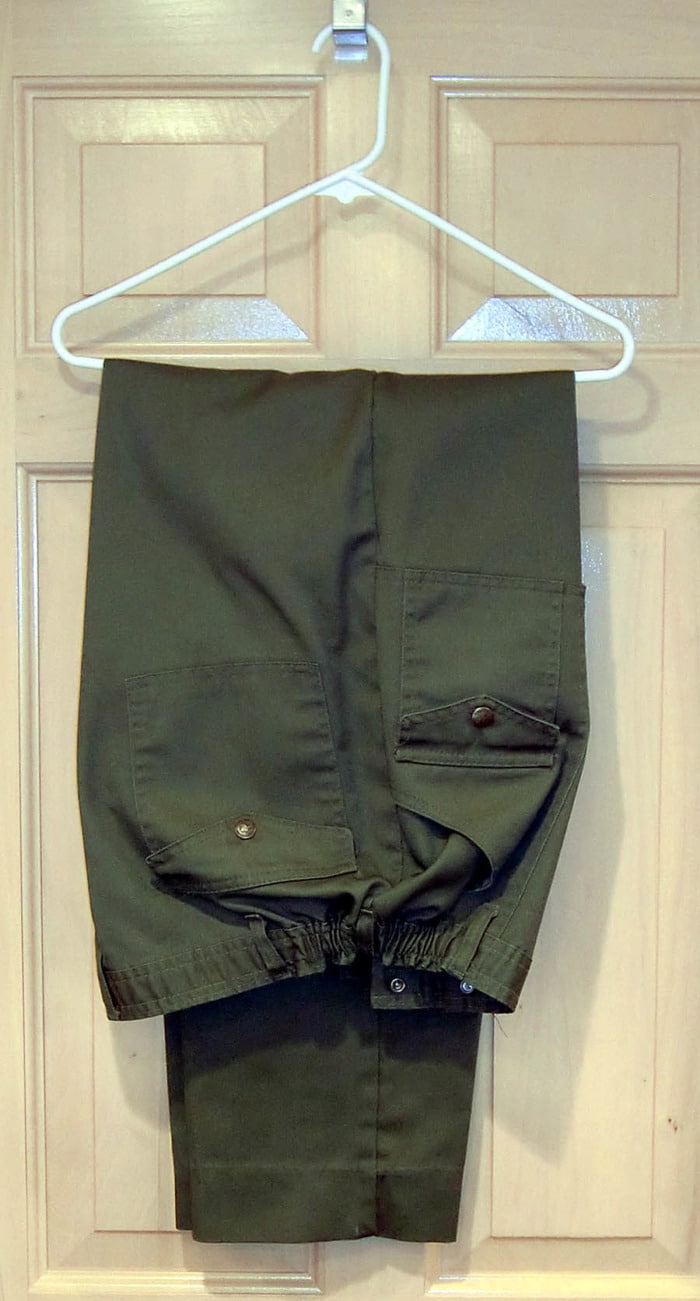
The pants are made of sturdy fabric that are a great choice for a durable outside fabric for the bag. We also have patch pockets, a zippered fly front, and hip pockets to put to good use.
Formulate a Plan for Construction
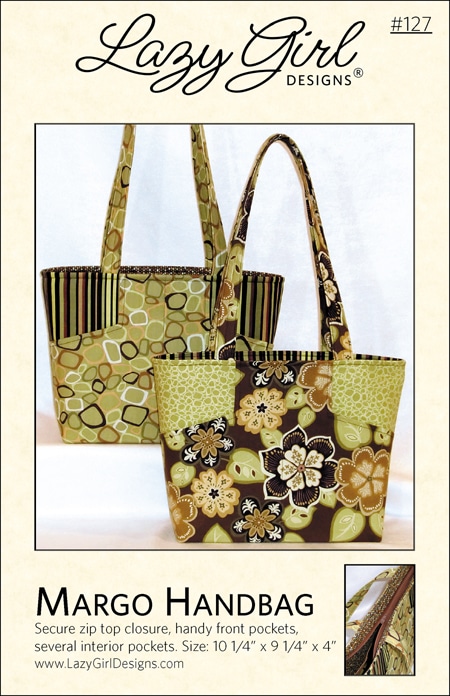
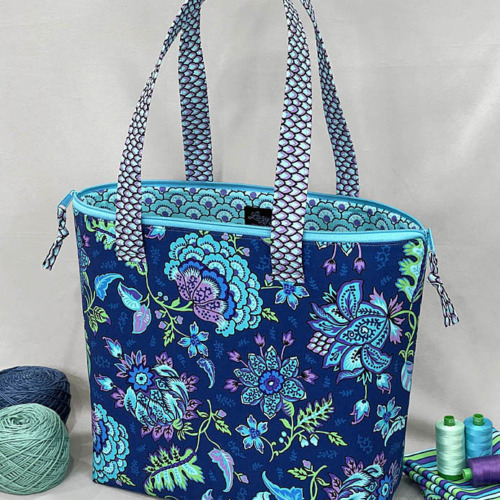
Choose a purse or bag pattern with a basic shape. I used the style, size and construction approach of my Margo Handbag pattern (below) as the basis for this bag. Simply put, constructt the four major pieces of the bag out of the top and pants: outside front/back and the lining front/back.
Then cobble together bits and pieces of the uniform until they mimic the parts of the bag. Add and trim as needed to make sure these four pieces are the same size. Then add the handles, zip top closure, and stitch all of the pieces together to finish the bag.
Kim’s Scout bag. Size: 12″ wide by 11″ tall by 4″ deep.
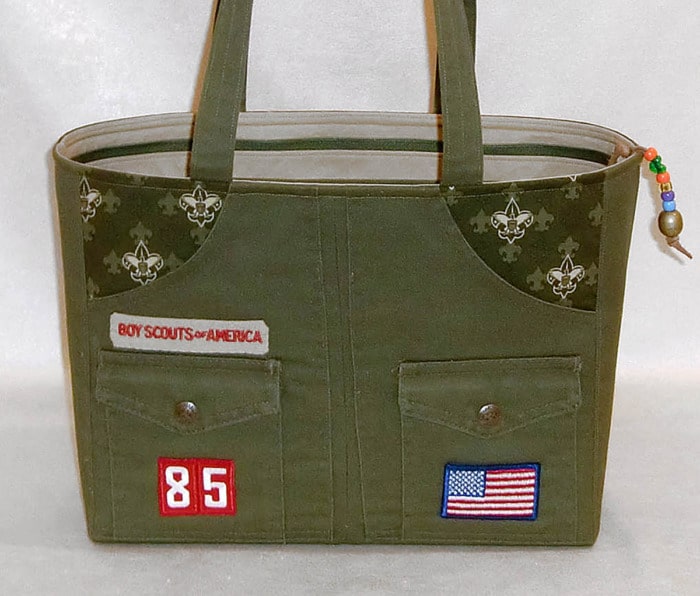
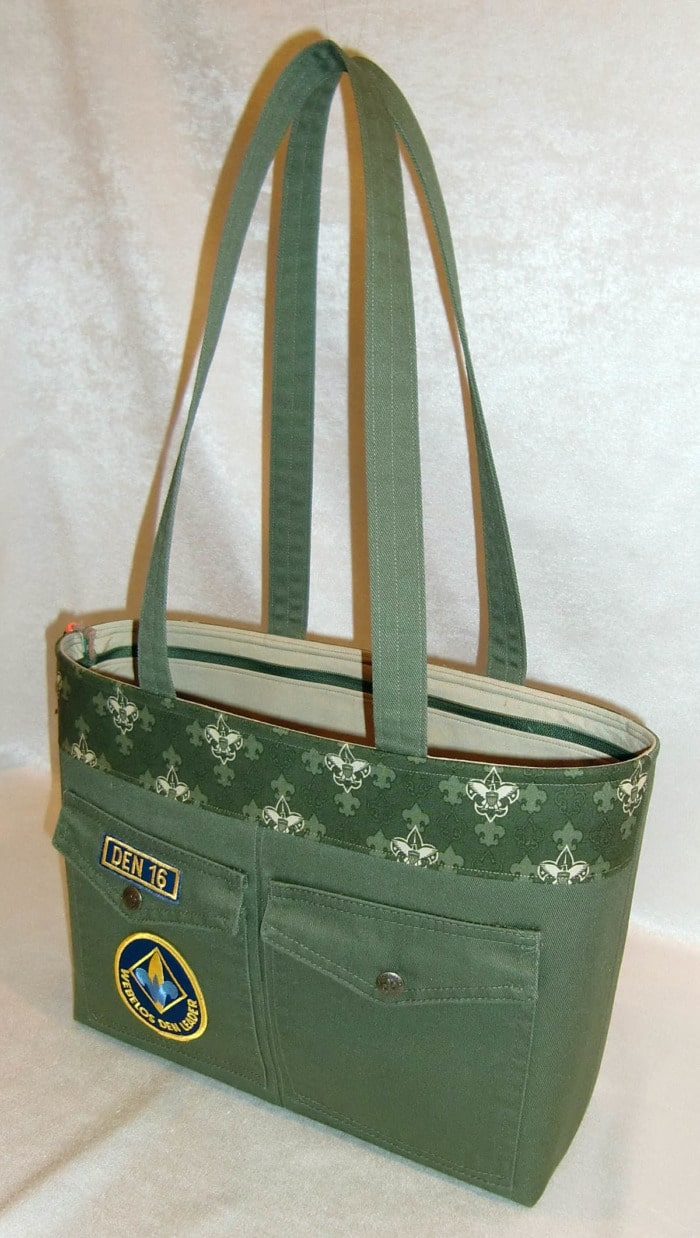
Look at this beauty! I love how the bag turned out. This is the front of the bag.
Front of Kim’s bag.
Use the Pants for the Outside of the Bag
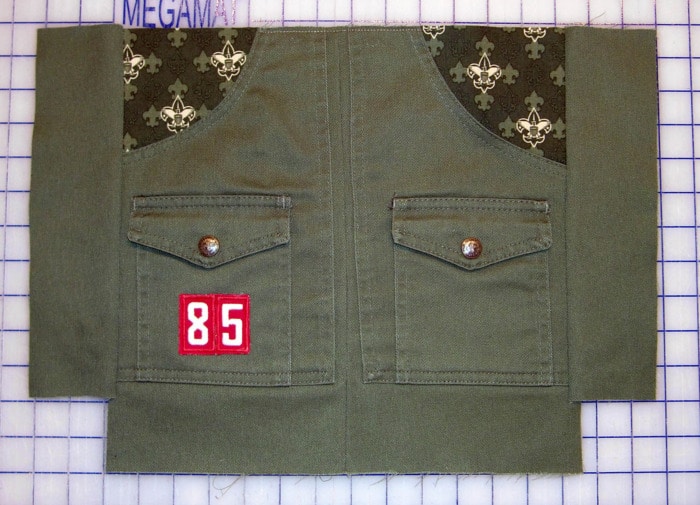
The pants were a bounty of good things, waiting to go to work as a purse. I used the front and back pockets to make the front and back of the bag. Cut the pants just below the crotch, then trim near the side and middle seams in order to make the largest flat pieces possible.
Bag Front: Here’s the front of the bag. The hip patch pockets with the curved openings are perfect here. Cut around them, then sew them together, leaving the pockets intact. Add panels to the left and right edges to make the piece wide enough. The lower corners will form the boxed bottom of the bag so no fabric is needed there.
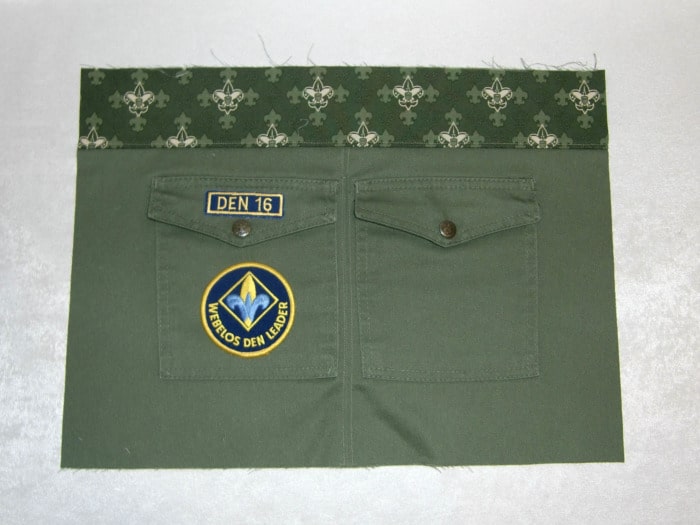
Bag Back: Construct the back of the bag the same as the front. Use the patch pockets, intact, including some of the pants fabric around each pocket to make the piece big enough for the purse. If you are short of fabric, remove the pockets and sew them to a new base fabric. Here I added a ‘waistband’ at the top to get the size needed.
The awesome badges from Kim’s shirt were added to the front and back of the bag, including her troop and den numbers. Sewing badges on by hand is no picnic. I hope someone has come up with a quick way to add these beauties. Sewing by hand is not Lazy!
Use the Shirt for the Lining
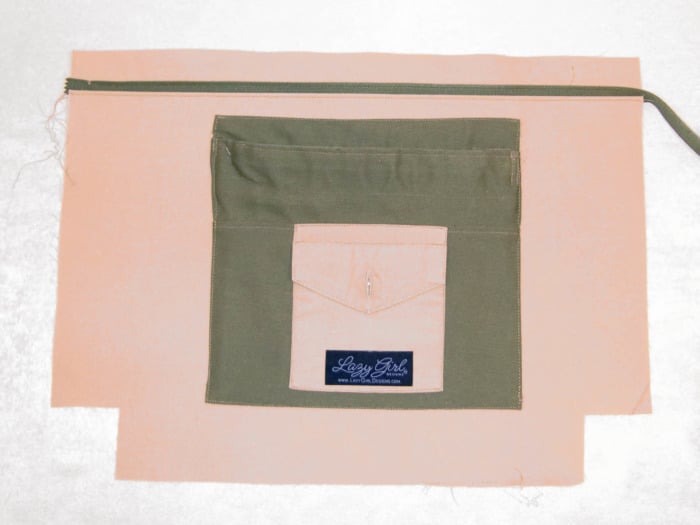
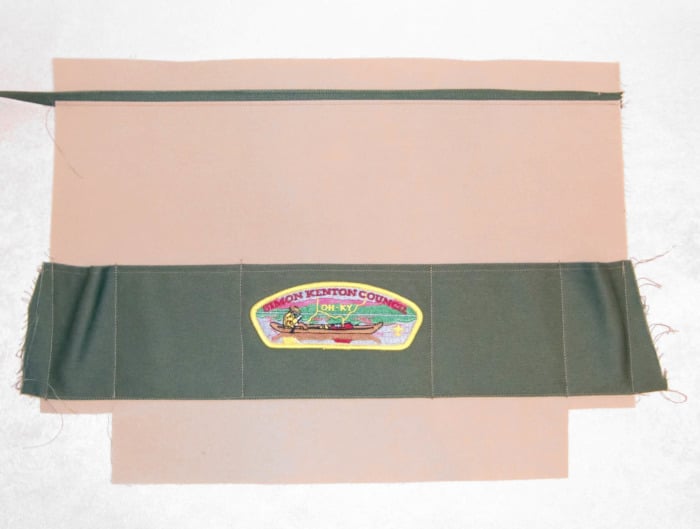
Now, let me tell you, the inside of the bag is a blank slate ready for fun. The back of the shirt was large enough for both lining pieces. Add a medium weight fusible interfacing, like my Face-It Firm SLG104 for structure.
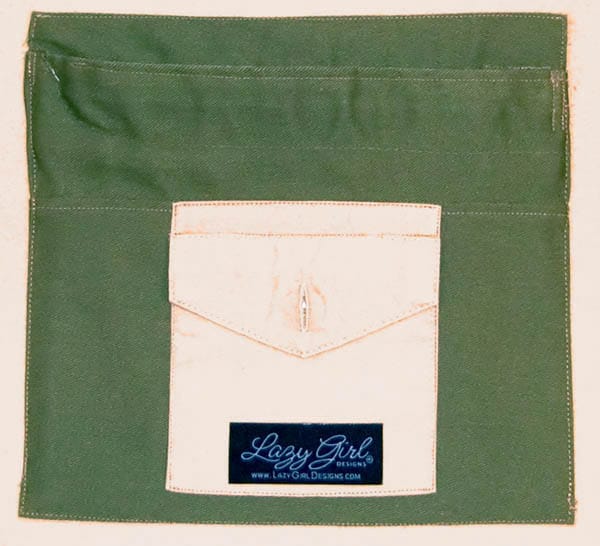
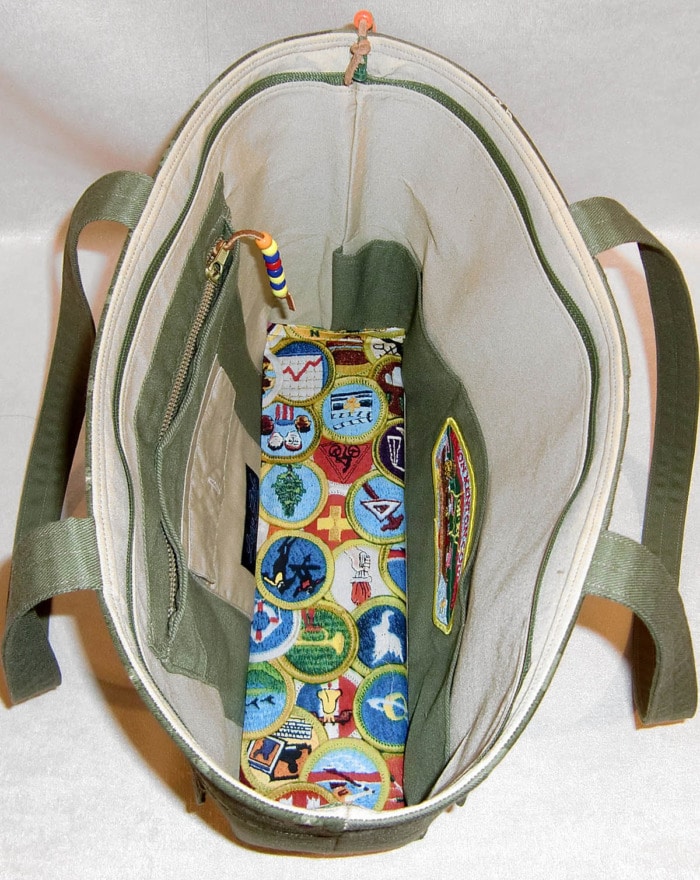
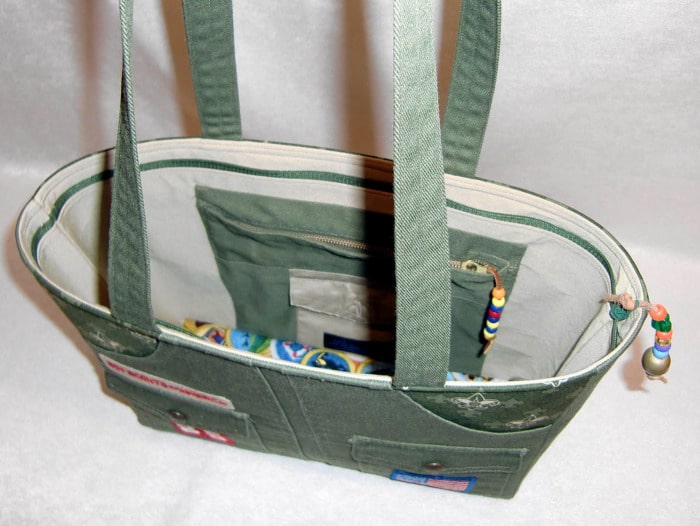
The pant’s fly front zip is turned sideways, or horizontal, and a pocket is built around it for the lining. Then I added a shirt breast pocket on top of that.
Use extra fabric from a pant’s leg to make a band of pockets for the other lining piece. Some leather strips and charms from each scouting event make great zipper pulls.
Don’t forget to use those badges! The pockets are a great place to add any badges you still have left.
Zippered Fly Front
Remember the zipper fly front? Here’s a closer look at that. The fly front zip from the pants is turned sideways and incorporated as the top edge of a zippered pocket! After removing the waistband, sew the open end of the zip fly closed. Put those great sewn features to work for you.
Look at how festive the inside of the bag is! It will be a treat every time Kim opens the bag.
Finally, Kim’s height provided lots of pant leg length so I was able to make long shoulder straps for her bag. Just a couple more views.
I love seeing the inside of a bag!
Kim loves her bag. When I gave Kim this bag, she investigated every nook and cranny, tried to discern where each part of the bag came from, and immediately moved into the purse. What special garment do you have tucked away, waiting to be transformed into a new favorite?
That’s Pinterest-ing!
Join me on Pinterest here, remember to ‘Follow’ me there, and pin this post and pics to your Pinterest boards.
Subscribe: New to our blog? Subscribe to get emails so you don’t miss a juicy morsel.
Like and share this post with your stitchy friends.
Join me in the Lazy Girl community on Facebook here: Facebook Lazy Girl
Enjoy!
Joan
Facebook Lazy Girl
Pinterest Joan Hawley
Pinterest Lazy Girl Community
Instagram @JoanHawley
Twitter LazyGirlJoan
What a great purse! We all have those clothes that we don’t wear, but can’t part with either. What a wonderful way to repurpose them. Thanks for the inspiration!
What a fantastic Margo Bag! She’s my favorite!
I saw your post a while back before when you said you were going to turn a bunch of old uniform pieces into a handbag and was pretty skeptical. But having now seen the bag it is awesome. Our Scoutmaster’s son’s Eagle ceremony was this weekend and I can see that even when the mom is not there at the meetings, she has put a lot of time in over the years to help make it happen. When the mom has also been a leader that investment is infinitely deeper. What a terrific memento for many years of mentoring.
Joan, You never cease to amaze me. Do you dream about these items every night? LOL
The purse is absolutely beautiful.
I know your friend was very happy when she saw this finished project. It is really adorable and meaningful.
fondly, Jean
Tried to join you on facebook using the link about but they say “no can do”. I think i tried last week too, but was declined.
LOVE the bag. Have the pattern for the Margo bag, but have yet to make myself one. Need to put that on my 2011 goal list.
Sheryl, Make sure you have a Facebook account and are logged in. Then it should let you join our group there.
Awesome!!! This is an incredible idea! Thanks-thanks-thanks!!
Joan, you are incredible! This bag is a genuine treasure. You inspire me to go digging for the Cub Scout uniform of my son who is now age 44 to make a mini-bag!
that is ADORABLE! Such talent and creativity… thanks for sharing. I’m now going to look for a Navy uniform and make something like that for me!!!
This is really great, I haven’t made a Margo bag but will definitely do that soon. And using the uniform is very memorable for your friend & will enjoy it for years to come. I made purses out of jeans but not any uniforms, I do have a strap with one of my girls girl scout badges on it, I’m not sure which one it belongs to. It’d be neat to make that some how into a bag or wallet, I’ll have to think about it. Thanks
With that bag you will “Always Be Prepared”. Joan, great foresight!
Joan, you have been hiding something from us. This bag is over-the-top impressive–and not the least bit Lazy. What a fantastic creation!
Joan,
I thought that I have seen all of the great ideas. But boy, this one tops them all. Does your brain ever rest…You keep us thirsty for more.
Thanks for all of the wonderful ideas and beautiful projects.
Have a wonderful Holiday,
Fonda
Love this idea thanks…this is great.
As a fellow scout leader for the last decade I know how much that bag is loved! I love it, love it. Do you hire yourself out? 🙂
This is awesome. What a great idea!
Hi, Joan! Great job on the bag. Here’s a great lazy way to attach those Boy Scout patches: use fusible thread! Just sew around the patch with fusible thread in your bobbin and invisible thread on top. Then fuse it in place. Quick, easy, and oh-so-lazy!
You can read more about fusible thread at my website:
http://www.byannie.com/shop/product/fusible-thread/
I made my daughter a Towne purse from a pair of my husband’s old corduroy pants. The back pockets were so unique and worked perfectly on the outside of the bag. She loved that bag and all her friends wanted one just like it! But she was happy to tell them that it was one of a kind and could not be duplicated!
What a great friend you are to make this very special bag for your friend. I’m sure that makes it all the more special to her.
WOW that is awesome. How neat. 🙂
Susie
Thanks for sharing your creation. I love all your purses and am always trying to think up something different. Recently I used a Trader Joe’s fabric shopping bag to make a Sassy Bag. It came out great. I am now inspired to start thinking even more out of the box.
Joan, this is a true masterpiece- just awesome. Congratulations to Kim and her son on such a distinguished accomplishment. I have 3 Eagle Scout nephews as well as my late father-in-law.
Fantastic Having such creativity is a blessing. Enoy it as we al do when you show us your creativity
You never cease to amaze me. Thanks for the idea and inspiration. I was a Cub Scout Den mom as well as the Outings Director on the Exe. Board. I’m definitely going to dig out those uniforms and make one for me and one for our daughter-in-law. Thanks again!
what a fantastic idea!!! and the bag looks fabulous!
I love this idea! What a great way to show what you have been to others and what you have accomplished. Awesome!!!!
this got me to thinking – my late husband has several coveralls and patches left over, I think this would be a great way to preserve them. thank you very much for the idea.
I know I’m on the late freight commenting on this bag, but it’s got a fabulous look and I’m lovin’ it. I have to try my hand at making one. Thanks for sharing!
May I have a pattern for this bag?
very cute! Have you posted a pattern? I’d love to make these for our WEBELOS moms with boys whi will cross to Boy Scouts. 🙂
This is just wonderful! I’ve saved mine & my sons’ Boy Scout uniforms with the thought to make a purse with the pants for myself. I just hadn’t figured out how I wanted to do it yet. This would be perfect for a purse, but also one for someone I know who is still very active and could use it to tote her files back and forth in.
I would love it if you would post a tutorial and some directions for this, there are a few things I can’t figure out how you did just by looking.
Where did you find the fabric for the top and to fill in the pockets? I would love to have a tote bag like this.